
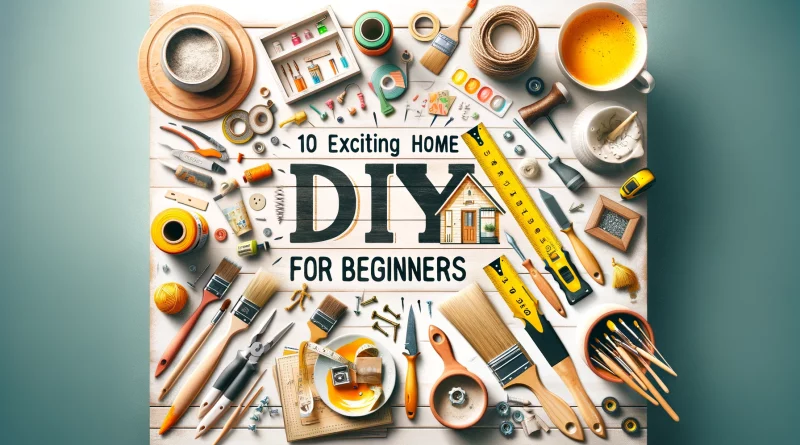
Jump Into Do-It-Yourself Creation: 10 Exciting Home DIY Projects For Beginners
Table of Contents
Introduction: Embarking on the Exciting Journey of Home DIY Projects
Embarking on a home DIY project can be an incredibly rewarding experience. Not only does it allow you to save money and customize your home to your liking, but it also gives you a sense of accomplishment and pride in your work. However, before you dive into your first project, it’s important to do your research and plan ahead to ensure a successful outcome.
1. Choose the Right Project
The first step is to choose a project that is appropriate for your skill level and budget. If you’re a beginner, it’s best to start with a simple project, such as painting a room or installing new hardware. As you gain experience, you can gradually take on more challenging projects, such as remodeling a bathroom or building a deck.
2. Do Your Research
Once you’ve chosen a project, it’s time to do your research and gather all the information you need to complete it successfully. This includes reading books, watching videos, and talking to experts. You should also make sure you have all the necessary tools and materials before you start.
3. Plan Ahead
Once you have all the information you need, it’s time to plan your project. This includes creating a budget, a timeline, and a list of the steps you need to take. It’s also important to get any necessary permits or licenses before you start.
4. Get Started!
Now it’s time to start working on your project! Be sure to follow your plan and take things one step at a time. Don’t be afraid to ask for help if you need it, and don’t be discouraged if you make a mistake. Everyone makes mistakes when they’re first starting out.
5. Enjoy Your New Project!
Once you’ve completed your project, take a step back and admire your work. You should be proud of what you’ve accomplished! Your new project will not only improve your home, but it will also give you a sense of satisfaction and accomplishment.
Home DIY projects can be a fun and rewarding experience. By following these tips, you can ensure that your project is a success.
1. What are the Essential Tools for Home DIY Projects?
Stepping into the world of home DIY projects can be an exciting and rewarding experience. Whether you’re a seasoned do-it-yourselfer or just starting out, having the right tools is essential for completing your projects successfully and efficiently. This comprehensive guide will provide you with an overview of the essential tools that every home DIY enthusiast should have in their toolbox.
1. Safety Gear: A Foundation of Protection
Before diving into any DIY project, prioritizing your safety is paramount. Personal protective equipment (PPE) is crucial for safeguarding yourself from potential hazards. This includes items like safety glasses, work gloves, a dust mask, and a hard hat for overhead projects. By using appropriate PPE, you can minimize the risk of accidents and injuries, allowing you to work with peace of mind.
2. Measuring and Marking Tools: Precision and Accuracy
Accurate measurements are the cornerstone of successful DIY projects. A tape measure, carpenter’s square, and level are essential for ensuring precise cuts, alignments, and installations. A utility knife and marking pencil or chalk are also valuable additions for marking and scoring materials. With these tools, you can achieve the accuracy necessary for a professional-looking finish.
3. Cutting and Drilling Tools: Shaping and Joining Materials
For DIY projects involving cutting and drilling tasks, a circular saw, a drill and a set of drill bits are indispensable. These tools enable you to cut through various materials like wood, metal, and plastic. Additionally, a reciprocating saw is useful for making intricate cuts in tight spaces, while a jigsaw excels at curved cuts. A sander is also essential for smoothing rough edges and preparing surfaces for painting or finishing.
4. Fastening Tools: Securing Components Together
Joining materials together requires a reliable set of fastening tools. A hammer is essential for driving nails, while a screwdriver set is necessary for screws of different sizes. A staple gun can be useful for upholstery and light carpentry projects. For heavy-duty fastening tasks, a power drill equipped with various drill bits can handle a wide range of materials.
5. Specialized Tools: Enhancing Project Versatility
Depending on the specific DIY projects you undertake, specialized tools can greatly enhance your capabilities. A miter saw is ideal for making precise angled cuts, while a table saw is suitable for larger woodworking projects. If you plan on working with electrical wiring, a voltage tester and wire strippers are essential safety precautions. Additionally, a ladder and a tool bag or belt will help you stay organized and safe while working.
By equipping yourself with these essential tools, you can confidently tackle a wide range of home DIY projects, transforming your living space and gaining a sense of accomplishment. Remember to always prioritize safety, work with precision, and choose the right tools for the job at hand. With the right tools and knowledge, you can embark on your DIY journey and create a home that reflects your unique style and creativity.
2. How Can I Choose the Right Home DIY Projects for My Needs?
Selecting the appropriate home DIY projects that align with your needs requires careful consideration and planning. Here’s a step-by-step guide to help you choose the right ones:
1. Assess Your Skills and Abilities:
- Evaluate your existing skills and abilities in DIY projects.
- Consider the complexity and technical requirements of various projects to determine which ones match your skill level.
- Identify areas where you may need to acquire new skills or seek assistance.
2. Determine Your Project Goals:
- Define the purpose and outcome you aim to achieve with the DIY project.
- Consider whether you’re seeking functional improvements, aesthetic enhancements, or a combination of both.
- Clarity in project goals helps you choose projects that align with your desired outcomes.
3. Evaluate Time and Resource Constraints:
- Assess the time you can realistically allocate to the DIY project.
- Consider your available budget and resources, such as tools, materials, and any necessary permits.
- Ensure that the project scope aligns with your time and resource limitations.
4. Conduct Thorough Research:
- Gather information and inspiration from online resources, home improvement magazines, and DIY tutorials.
- Study different project options, their難易难度, and potential outcomes.
- Research the specific materials, tools, and techniques required for each project.
5. Consider Safety and Legal Requirements:
- Be aware of any safety regulations or legal requirements related to your chosen DIY project.
- Ensure you have the necessary safety gear and knowledge to protect yourself while working.
- Obtain any permits or approvals required for specific projects, especially those involving structural changes or electrical work.
6. Plan and Prioritize Your Projects:
- Create a list of potential DIY projects and prioritize them based on their importance, feasibility, and your available resources.
- Develop a timeline for each project, taking into account the estimated completion time and any dependencies.
- Consider breaking down larger projects into smaller, more manageable tasks.
7. Seek Expert Advice if Needed:
- Don’t hesitate to consult experts or experienced DIY enthusiasts for guidance and advice.
- Join online forums, attend workshops, or seek professional help for complex or technically demanding projects.
- Expert advice can save you time, prevent costly mistakes, and ensure the success of your DIY projects.
3. Where Can I Find Inspiration for Home DIY Projects?
Finding inspiration for home DIY projects can be a daunting task. With so many ideas out there, it can be hard to know where to start. Here are a few tips for finding inspiration for your next home DIY project:
1. Look around your home. Take a walk around your house and take note of things that need to be fixed or updated. This could be anything from a leaky faucet to a cracked wall. Once you have a list of things that need to be done, you can start brainstorming ways to fix them yourself.
2. Browse home improvement magazines and websites. There are countless home improvement magazines and websites available, both online and in print. These resources are a great way to get ideas for new projects. You can find articles on everything from simple repairs to major renovations.
3. Visit home improvement stores. Home improvement stores are a great place to find inspiration for DIY projects. You can browse the aisles and see what new products and materials are available. You can also talk to the staff at the store for advice on what projects you can do yourself.
4. Attend home improvement workshops and classes. Many home improvement stores and community centers offer workshops and classes on a variety of DIY projects. These classes are a great way to learn new skills and get ideas for your own projects.
5. Get inspired by others. Talk to your friends and family about their home DIY projects. You can also find inspiration online by looking at photos and videos of other people’s projects.
Once you have found some inspiration, it’s time to start planning your project. Make sure you have all the necessary materials and tools before you start. You should also set a budget and a timeline for your project. With a little planning and effort, you can complete any home DIY project you set your mind to.
4. What Safety Precautions Should I Take when Doing Home DIY Projects?
Engaging in home improvement projects can be fulfilling, but prioritizing your safety is paramount. Here are essential safety measures to consider before embarking on any DIY endeavor:
1. Wear Appropriate Safety Gear:
- Protective Eyewear: Shield your eyes from flying debris, chemicals, and harmful UV rays. Opt for safety glasses or goggles that comply with industry standards.
- Work Gloves: Protect your hands from sharp objects, chemicals, and rough surfaces. Select gloves that provide a secure grip and withstand the task at hand.
- Safety Footwear: Sturdy, closed-toe shoes with slip-resistant soles are crucial to prevent accidents caused by slippery surfaces or falling objects.
- Protective Clothing: Long-sleeved shirts and pants can safeguard your skin from potential irritants, debris, and sparks. Consider wearing a dust mask or respirator for projects involving hazardous fumes.
2. Proper Preparation and Planning:
- Thorough Research: Before commencing any project, conduct thorough research to gain a comprehensive understanding of the task. Seek guidance from reliable sources, such as DIY books, instructional videos, or online resources.
- Gather Necessary Tools and Materials: Ensure you possess all the necessary tools, equipment, and materials before starting. Having everything at hand minimizes the need for frequent trips to the store, reducing the risk of accidents.
- Choose the Right Tools: Select tools designed specifically for the job. Using the wrong tools can lead to accidents, poor results, and damage to materials or property.
3. Maintain a Clean and Organized Work Area:
- Clear the Workspace: Remove clutter, obstacles, and tripping hazards from the work area to create a safe and efficient environment.
- Properly Store Tools and Materials: Keep tools and materials organized and easily accessible. Securely store them after use to prevent accidents and maintain a tidy workspace.
- Adequate Lighting: Ensure adequate lighting in the work area to enhance visibility and minimize the risk of accidents. Good lighting helps you identify potential hazards and work safely.
4. Follow Manufacturer Instructions:
- Read and Understand Manuals: Carefully read and comprehend the instructions provided with tools, equipment, and materials. This ensures their proper use, reducing the risk of accidents and optimizing project outcomes.
- Observe Safety Labels: Pay attention to safety labels and warnings on products and equipment. These labels provide crucial information regarding potential hazards and appropriate safety measures.
5. Work Safely with Electricity:
- Turn Off Power: Before working on electrical circuits or appliances, always turn off the power at the main breaker or fuse box. This simple step eliminates the risk of electrical shock.
- Use Insulated Tools: When working with electricity, utilize insulated tools specifically designed for electrical work. These tools minimize the risk of accidental shocks and ensure safe handling of electrical components.
- Test Circuits: Before touching any electrical wires or components, use a voltage tester to verify that the power is off. This precaution helps prevent electrical shocks and potential injuries.
6. Stay Alert and Focused:
- Avoid Distractions: Dedicate your full attention to the task at hand. Avoid distractions such as phone calls, texting, or engaging in other activities while working on a DIY project.
- Take Breaks: Regular breaks help maintain focus and prevent fatigue. Take short breaks throughout the project to refresh your mind and body, reducing the risk of accidents.
- Work in Pairs: Whenever possible, work with a partner or helper. Having another person present enhances safety and provides assistance if needed, particularly for tasks involving heavy lifting or working at heights.
7. Know Your Limits:
- Assess Your Skills: Be realistic about your abilities and limitations. If a task seems too complex or dangerous, don’t hesitate to seek professional assistance. Attempting tasks beyond your skill level can lead to accidents and injuries.
- Don’t Rush: Avoid rushing through projects. Take your time, work carefully, and pay attention to detail. Rushing can lead to mistakes, accidents, and poor-quality results.
5. How Do I Prepare My Workspace for Home DIY Projects?
Whether you are an experienced do-it-yourselfer or just starting, having a well-prepared workspace is essential for successful home DIY projects. A well-organized and safe workspace will increase efficiency, reduce the risk of accidents, and make your projects more enjoyable.
Preparing your workspace for DIY projects involves several key steps, including selecting the right location, ensuring proper lighting, and organizing tools and materials effectively. Let’s delve deeper into each aspect to help you create an ideal workspace for your home DIY endeavors.
1. Choosing the Right Location
The first step in preparing your workspace is choosing the right location. Consider the following factors when making your decision:
- Adequate Space: Ensure the area you select has enough space to accommodate your projects and allow you to move around comfortably.
- Good Ventilation: Choose a well-ventilated area to avoid exposure to harmful fumes or dust generated from certain projects.
- Proximity to Utilities: Make sure the location has easy access to power outlets, water, and other utilities you might need.
- Safety: Select a space away from high-traffic areas and potential hazards.
2. Proper Lighting
Good lighting is crucial for any workspace. Ensure your area has adequate natural light or install artificial lighting if necessary. Consider installing task lighting to provide focused illumination for specific areas.
3. Organizing Tools and Materials
Organization is key to a productive workspace. Implement the following strategies to keep your tools and materials organized:
- Storage Solutions: Invest in sturdy storage cabinets, shelves, and toolboxes to store your tools and materials neatly.
- Labeling: Label your storage containers and drawers clearly to make it easy to find what you need quickly.
- Tool Storage: Use pegboards, magnetic strips, or tool organizers to keep your tools neatly arranged and accessible.
- Materials Organization: Use clear containers or shelves to organize small parts and materials, making them easy to locate.
By following these steps and incorporating these tips, you can create a well-organized and safe workspace that will enhance your DIY project experience and lead to successful results. Remember, a well-prepared workspace is a key factor in making your home DIY projects more enjoyable and productive.
6. Which Home DIY Projects are Perfect for Beginners?
As a beginner embarking on home DIY projects, it’s essential to select projects that are both achievable and rewarding. These projects will boost your confidence and lay the foundation for tackling more complex tasks. Here are several home DIY projects that are ideal for beginners, offering a perfect blend of simplicity, practicality, and the satisfaction of completing a task around the house.
1. Simple Painting Projects:
- Fresh Coat of Paint: Rejuvenate a room’s ambiance by applying a fresh coat of paint to the walls. Choose colors that complement your decor and personal style, transforming the space with minimal effort and cost.
- Accent Wall: Create a focal point in your living room, bedroom, or home office with an accent wall. Paint one wall in a bold color or pattern, adding a touch of personality and style to the room.
2. Basic Plumbing Tasks:
- Faucet Repair: Leaky faucets are a common issue that can be easily resolved with a DIY approach. Replace worn-out washers or seals, following step-by-step instructions available online or in home improvement stores.
- Unclog Drains: Blocked drains can cause frustration and inconvenience. Tackle this issue by using a drain snake or natural drain cleaners like baking soda and vinegar. Regular maintenance can prevent future clogs.
3. Minor Electrical Fixes:
- Replacing Light Fixtures: Upgrade your outdated light fixtures with new, stylish ones. Ensure that you follow safety precautions and adhere to electrical codes. Beginners can start with simple fixtures like pendant lights or sconces.
- Outlet Installation: Add convenience to your living space by installing additional outlets. Plan the location carefully and follow safety guidelines to ensure proper functioning.
4. Simple Carpentry Projects:
- Build a Floating Shelf: Create a stylish and functional floating shelf to display books, plants, or decorative items. With basic tools and a few pieces of wood, you can add storage space and a touch of charm to your room.
- Make a Birdhouse: Engage in a fun and rewarding project by building a birdhouse. It’s a great way to attract wildlife to your garden and provide a nesting place for birds. Choose a design that suits your taste and enjoy the satisfaction of creating a home for feathered friends.
5. Gardening and Landscaping Projects:
- Container Gardening: If you don’t have a dedicated garden space, opt for container gardening. Grow herbs, vegetables, or flowers in pots or raised beds. This is an ideal project for beginners, allowing you to experiment with different plants and gardening techniques.
- Build a Raised Garden Bed: Construct a raised garden bed to enhance soil quality and make gardening more accessible. It’s a great way to grow your own produce or add a touch of greenery to your outdoor space.
Remember, these home DIY projects are intended to provide a starting point for beginners. As you gain confidence and experience, you can tackle more complex projects that align with your interests and skills. The key is to start small, learn from your mistakes, and enjoy the process of transforming your home into a space you love.
7. Can I Find Affordable Home DIY Projects that Fit My Budget?
Transforming your living space on a budget is possible with creative DIY (do-it-yourself) projects that enhance your home’s aesthetics without breaking the bank. These projects can add a personal touch to your home while saving you money on professional services. Here’s a guide to finding affordable home DIY projects that fit your budget:
1. Assess Your Budget and Resources:
Start by evaluating your budget and resources. Determine how much you can allocate towards the project and what materials and tools you already have. This will help you narrow down your choices to projects that fit your financial constraints.
2. Research and Inspiration:
Explore online platforms, home improvement magazines, and social media for DIY project ideas. Look for projects that align with your budget and skill level. Gather inspiration from these sources and create a shortlist of projects that excite you.
3. Choose Projects with Low Material Cost:
Select projects that utilize inexpensive or recycled materials. Thrift stores, garage sales, and online marketplaces often offer affordable materials. Consider using repurposed items or upcycling old furniture to save money.
4. Plan and Prioritize:
Create a project plan that outlines the steps involved, materials required, and estimated costs. Prioritize projects based on their impact, difficulty level, and budget. Focus on projects that offer the most value for your money.
5. Explore Free or Low-Cost Workshops and Tutorials:
Many home improvement stores and online platforms offer free or low-cost workshops and tutorials that teach DIY skills. These workshops can provide you with the knowledge and guidance you need to complete projects successfully.
6. Utilize DIY Kits:
Consider using DIY kits for specific projects. These kits often include all the necessary materials and instructions, making them convenient and cost-effective options for beginners or those short on time.
7. Upcycle and Repurpose:
Upcycling and repurposing old items can save money and add a unique touch to your home. Transform old furniture, bottles, or other items into functional and decorative pieces. This approach is both eco-friendly and budget-friendly.
8. Collaborate with Friends and Family:
If you have friends or family members interested in DIY projects, collaborate with them to share resources, tools, and ideas. This can make projects more enjoyable and help you save money by purchasing materials in bulk.
9. Be Patient and Persistent:
DIY projects may take time and effort to complete, especially if you’re a beginner. Be patient and persistent throughout the process. Don’t be discouraged by setbacks or mistakes; they are opportunities for learning and improvement.
10. Enjoy the Process and Celebrate Your Accomplishments:
Remember that DIY projects are a journey, not just a destination. Enjoy the creative process and the satisfaction of completing a project yourself. Celebrate your accomplishments and use them as motivation for future projects.
With creativity, resourcefulness, and a bit of effort, you can find affordable home DIY projects that fit your budget and transform your living space into a reflection of your personal style.
8. How Can I Make My Home DIY Projects Unique and Personal?
Transforming ordinary home projects into expressions of personal style and creativity is a fulfilling endeavor. By weaving uniqueness and personality into your DIY ventures, you not only create functional spaces but also inject your individuality into your living environment. Here’s a comprehensive guide to help you make your home DIY projects uniquely personal:
1. Reflect Your Unique Style:
Begin your DIY journey by identifying your personal aesthetic. Do you prefer traditional elegance or modern minimalism? Are you drawn to bold colors or soothing neutrals? Understanding your style preferences will serve as a compass for your project choices.
2. Tell Your Story Through Design:
Your home is a canvas for storytelling. Each DIY project presents an opportunity to share a piece of your narrative. Incorporate elements that hold sentimental value, such as photographs, travel souvenirs, or heirlooms, to create a space that truly reflects your life.
3. Experiment with Personal Touches:
- Add Handmade Details: Infuse your projects with a personal touch by adding handmade elements like crocheted blankets, painted ceramics, or macrame wall hangings. These details add warmth and charm to any space.
- Customize Furniture: Upcycling old furniture pieces or personalizing new ones with paint, stencils, or decoupage allows you to create unique and eye-catching statement pieces.
- Create Unique Decorations: Craft custom wall art, DIY terrariums, or personalized photo displays to add a personal touch to your walls and shelves.
4. Functionality with a Personal Twist:
- Design Multifunctional Furniture: Create furniture pieces that serve multiple purposes. A coffee table with hidden storage or a foldable desk that doubles as a dining table adds functionality and personality to your space.
- Personalize Storage Solutions: Turn storage into a decorative element by using unique containers, labels, or painting techniques. This not only organizes your belongings but also adds visual interest.
5. Engage Your Senses:
- Incorporate Sensory Details: Enhance the sensory experience of your home by adding soft textures like cushions, throws, and rugs. Consider aromatic elements like scented candles or essential oil diffusers to create a calming ambience.
- Play with Lighting: Lighting can dramatically transform the mood and atmosphere of a space. Experiment with different lighting fixtures, colors, and techniques to create a unique ambiance that reflects your personality.
6. Collaborate with Others:
Involving friends, family, or even fellow DIY enthusiasts in your projects can lead to unexpected ideas and a collective sense of ownership. Collaborating with others adds a collaborative touch and makes the project more meaningful.
7. Embrace Imperfections:
Perfection is overrated when it comes to DIY projects. Embrace the beauty of imperfections and quirks that make your projects one-of-a-kind. These imperfections add character and authenticity to your creations.
Making your home DIY projects unique and personal is a journey of self-expression and creativity. By incorporating personal touches, experimenting with different techniques, and embracing your unique style, you can transform your living space into a true reflection of your personality.
9. What Techniques Can I Use to Simplify Home DIY Projects?
1. Planning and Preparation:
Early planning can reduce unexpected challenges and setbacks. Gather necessary materials, tools, and safety gear. Understanding the project process and ensuring you have the required supplies will make DIY projects more manageable.
2. Organize Your Workspace:
A clutter-free workspace can prevent accidents and delays. Arrange tools, materials, and equipment logically, allowing for easy access. A designated area for project debris removal will maintain cleanliness and safety.
3. Break Tasks into Smaller Steps:
Complex tasks, when broken down into smaller, manageable steps, become less intimidating. Create a step-by-step plan, enabling you to tackle each phase sequentially, reducing overwhelm and the risk of errors.
4. Gather the Right Tools:
The right tools can make a big difference in the efficiency and safety of your project. Make sure you have the necessary tools for the job. If you don’t have the right tool, consider renting or borrowing it from a friend or neighbor.
5. Utilize Online Resources:
Online tutorials, videos, and blogs can provide valuable guidance and inspiration. Look for detailed instructions, step-by-step guides, and expert advice that can help you navigate unfamiliar tasks or troubleshoot problems. This can significantly simplify the project and improve the outcome.
6. Consider Buying or Renting Power Tools:
Power tools can expedite tasks and reduce manual labor, especially for larger projects. If you don’t have the necessary power tools, you can rent them from a hardware store or home improvement center. Assess project requirements and select the appropriate power tools for efficient completion.
7. Learn Basic Skills:
Developing basic DIY skills, such as measuring, drilling, and cutting, can equip you for simple repairs and maintenance tasks. Learning fundamental techniques can not only simplify future projects but also empower you to handle minor issues around the house without relying on professional assistance.
8. Utilize Prefabricated and Modular Components:
Modular or prefabricated components, such as cabinets, countertops, and shelves, can save time and effort during DIY projects. They come in various sizes and styles, enabling customization to fit specific requirements. This can significantly simplify project completion and reduce the need for intricate carpentry or construction work.
9. Set Realistic Expectations and Deadlines:
Creating a realistic timeline can prevent overambitious goals and reduce project overwhelm. Avoid setting unrealistic deadlines that can lead to stress and compromise project quality. Instead, assess the complexity of the project and allocate a reasonable timeframe. This approach allows for unexpected challenges and ensures a successful outcome.
10. Patience and Flexibility:
DIY projects often involve unexpected challenges and hidden obstacles. Embracing patience and flexibility can help you adapt to unforeseen circumstances and navigate project challenges. Keep an open mind and consider alternative solutions or modifications to the original plan. This flexibility will prevent frustration and enable you to complete the project successfully.